 Easy
EasyLevel
 ~10 min./craft
Working time
 5-15€*
the costs
Shimmering Soap
|
Material
• organic soap basis• silicon moulds • jars with spouts • organic, natural oils e.g. vanilla, floral scents etc. • organic food colouring • small spoons or wooden stirrers • a microwave or a water bath on the stove • heat-safe pot (additionally with a spout) |
Instructions  About the Soap About the SoapWe're not doing a whole soap-mix ourselves (this time ^_^). I rather use some soap-basis, which you can get easily in a nice amount in the internet. I usually take organic soap basis, which also contains shea butter or cocoa butter or also sheep milk. These ingredients make skins softer and don't just clean but take care of it very much. Also, these basis never has a super intense scent or leaves an ugly feeling on your skin. (And for the people with allergics or something similar, these are perfectly fine usually.) The same goes for the oils and colours. I use naturals and organics, which usually avoids allergic reactions as long as you aren't allergic to the oils themselves and there are no synthetic colours in, which many are allergic to.  Step 1 – Heat, Mix and Pour Step 1 – Heat, Mix and PourNormally, I heat up the soap in the microwave because I have the perfect pot with a spout for it. But you also can heat it up over a water bath on the stove. Actually, all you must take care of that the soap doesn't start boiling but turns liquid and is steaming a bit. After that you need to be quite quick. The soap starts cooling down fast and you don't have time forever to put scents and colours in. Depending on the type of soap the colours are more or less intense, with shea butter soap the most colours turn very soft, but the more colour is in the more you can see the colour of course. For 200 ml of melted soap I'd recommend to use 3 drops of the oils max, because although never ever anyone has been "stunk to death", there can always be tooooooo much of it. Carefully mix the liquid soap with colour and scents. From a greater portion of soap you can do several colours and scents, usually I use one scent for the whole pot and split for several colours afterwards. When you decided on scent and colour, you can pour the liquid in the moulds you've chosen. Be careful not to spill it everywhere, when it's hot. Also the moulds should be placed even and in a place where they can rest for 30 minutes or an hour. After that the soap should be cooled down and you can take them out of the moulds. But let them rest over night before wrapping them as presents or so. They need to cool down totally before that. Some nice little tips: Little sacks of organza are perfect to wrapp the soap nicely and make them shimmer themselves. Also the soap isn't just for placing it at the sink for your hands. It's a wonderful zero-waste solution for your shower! |
Soft and rosy lipsticks
|
Ingredients & Material Ingredients for 2 Lipsticks All of the following ingredients are organical! • 2 tsp. beeswax • 1 tsp. cocoa butter • 1 tsp. coconut oil • 2/3 tsp. olive oil Further needed • shea butter (as replacement for either the coconut oil and or the cocoa butter) organic, natural oils • organic food colouring • additionally you can take beetroot, cinnamon or curcuma etc. to colour the lipsticks • also usable: coloured lipsticks, you already have around • small cosmetic jars or lipstick boxes • small spoons or wooden stirrers • a microwave or a water bath on the stove • heat-safe pot (additionally with a spout) |
Instructions 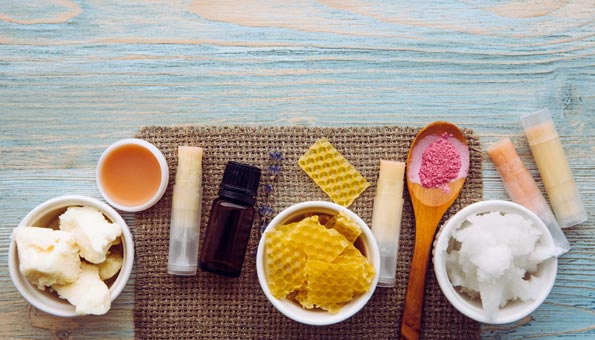 Step 1 – Mix, Heat and Pour For the lipsticks I could repeat all the stuff from the soaps, but in general here I am working organic and natural for many reasons. Especially because the lipsticks are great for your skin again and don't include many allergics. For the mixture it's more or less important that you stick to the ratio given here otherwise the lipsticks can be tooooo soft and don't work in the lipstick cases for example. Also, heat the ingredients carefully, it only need to melt not to boil. For this small amount of wax and oils, it only requires one drop of scent to make the lipsticks having a wonderful scent. After the ingredients are melted you can mix it with food colours or the other recommended colouring agents. When done, carefully pour the liquid lipstick in a lipstick case or a little jar, which will be used by taking some lipstick up at your finger and then put it on your lips. Therefore a jar with a fine spout might be helpful! Let cool down in a fridge over night. After that you can keep it in the fridge till you use it, don't place it somewhere too warm. 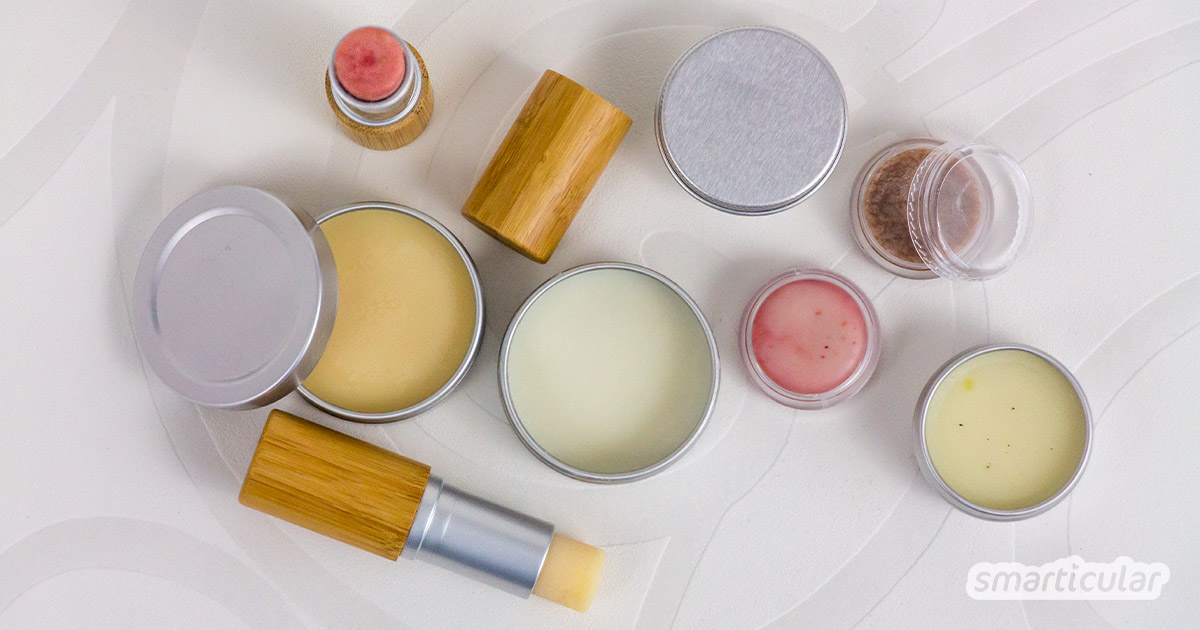 |
Palantíri Bathbombs
|
Ingredients ~ 4 pieces• spheric moulds • 100 gr coconut oil • 400 gr baking soda • 200 gr citric acid (food quality) • 60 gr starch • powdered or jelly food colouring (no liquid!) • additionally natural oils and further • a pot (easy to clean) |
Instructions 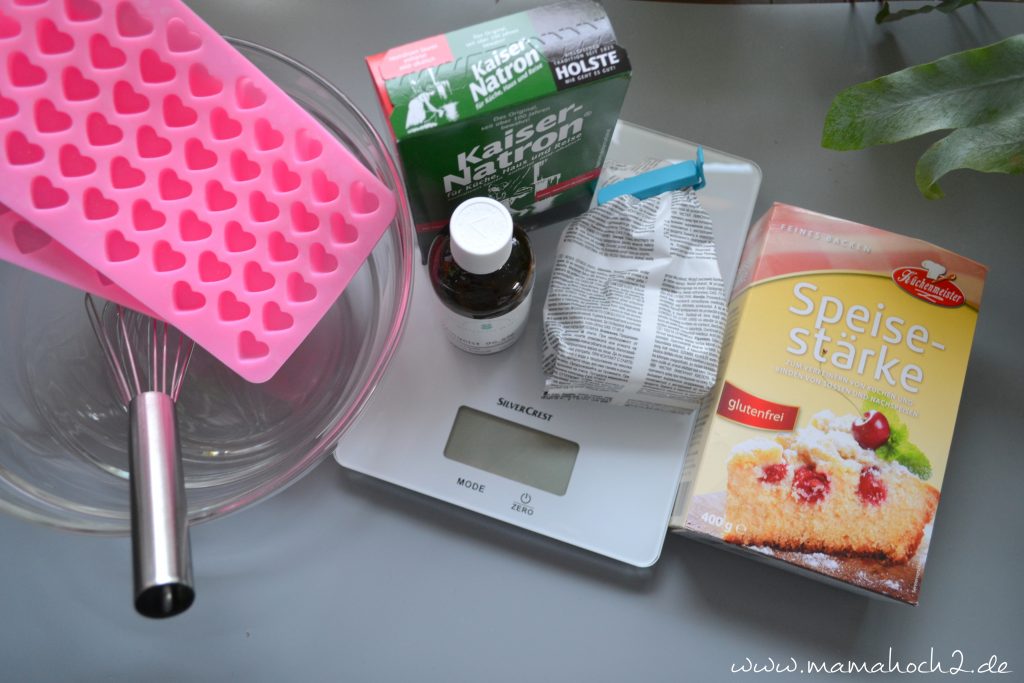 Step 1 – Mixture Firstly, melt the coconut oil in a pot. Take from the stove and put in the baking soda, citric acid and starch. Stir with a spoon and when cooled down enough, knead with your hands to a homogenic mass. After that you can add the scent and colours, for different colours use different little pots and mix by hand. The mass should be crumbly a bit, but stick together, when you compress it. If it's too dry, put some more coconut oil in, if it is too wet, just add some starch. 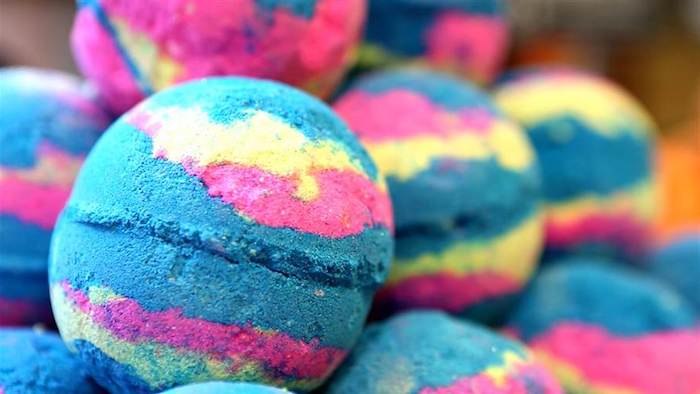 Step 2 – Moulds and Musters Step 2 – Moulds and MustersWith the right consistence, we're now ready to put the mass into the moulds. You mustn't take spheric moulds, you also can reuse the soap moulds from above, that's totally fine! To create e.g. a palantiri look, you must put in different layers with different colours until the moulds are full and the material is compressed a bit already. Afterwards put together the parts of the spheric moulds. Realease super careful from the moulds and let rest over night or for about 4 hours in the fridge. After that you're ready to bath bomb! |