|
|
Instructions

 Step 1 – The Memoboard Step 1 – The Memoboard
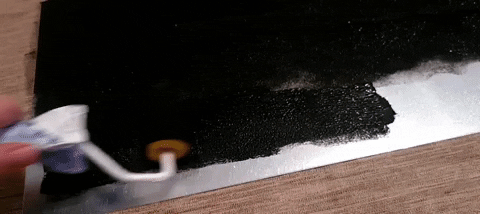
Our Memoboard will be magnetic and a blackboard. So, for our first step we take some protector for the underground and our steel panel.
With a rolling brush or paint roller we apply the blackboard paint on the clean surface of the metal panel. Make sure there are no fingerprints or oily spots on the panel, otherwise the paint will not stick and dry. For a smooth and nice surface I applied two layers on the board and let dry overnight.
Pro tip: If you are at the hardware store and don't know which panel is the right one, but you want it magnetic, just take a fridge magnet with you and test the different, plain panels. Depending on the use you can also take other panels, which aren't plain.
 Step 2 – The Wooden Panel Step 2 – The Wooden Panel
Before doing anything else, I'd advise you to apply the hooks or whatever you have to make the board hanging on the wall finally, before working on it, because later you might ruin your board while trying to get those thingys on. Also, I put some protectors out of felt on the back, so the wall won't get scratched and dirty by the board. Then we can go on working on the panel. 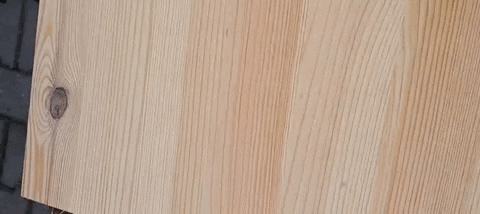 For the preparation of the panel, we must use the sandpaper. We smooth down the wood plankwise, with the raw sandpaper first, then we erase the dust and use the fine sandpaper. With the sandpaper we remove spinters or irregularities of the wood. Furthermore, the colour will stick much better. With a brush or a soft towel we can remove the wood dust from the panel. For the preparation of the panel, we must use the sandpaper. We smooth down the wood plankwise, with the raw sandpaper first, then we erase the dust and use the fine sandpaper. With the sandpaper we remove spinters or irregularities of the wood. Furthermore, the colour will stick much better. With a brush or a soft towel we can remove the wood dust from the panel.
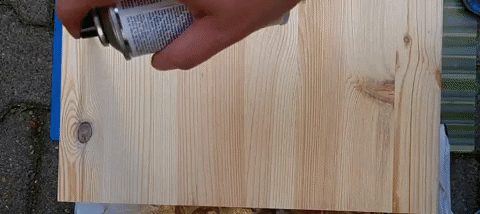 Before we now start colouring, look for a not too hot and windy place outside, especially when you work with spray such as I did. Cover the floor with newspapers or something else to protect it from getting coloured as well. The panel I usually put on some cans, so I can spray around the borders easily and it gets even. I've chosen a silver grey tone for the board, because it is light but not too light and is a great contrast to the other colours, and applied it carefully. Spray colour often dries very quickly, so you can attach it, let dry for an hour or so and then take care of decorations (see Step 4). Finally, I usually use clear coat to protect the colours and the decorations.(after Step 4!) Before we now start colouring, look for a not too hot and windy place outside, especially when you work with spray such as I did. Cover the floor with newspapers or something else to protect it from getting coloured as well. The panel I usually put on some cans, so I can spray around the borders easily and it gets even. I've chosen a silver grey tone for the board, because it is light but not too light and is a great contrast to the other colours, and applied it carefully. Spray colour often dries very quickly, so you can attach it, let dry for an hour or so and then take care of decorations (see Step 4). Finally, I usually use clear coat to protect the colours and the decorations.(after Step 4!)
Step 3 – A nice frame
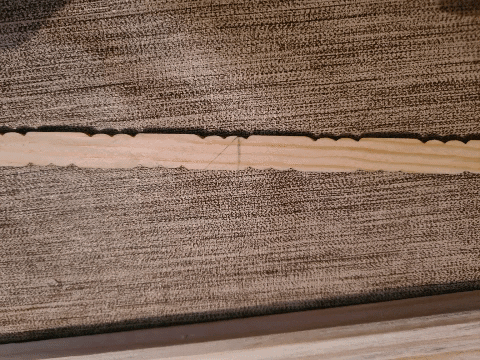 My wooden sticks or mouldings in this case, at first were way too long for building a frame for my board. So, the first thing we will have to do is to measure the length or with of the board and mark an angular of 45° at each end of the moulding. Try to be acurate, so the angulars will fit perfectly. After our marks are done, we can saw the rest off. To prevent splinters and sharp edgeds, I usually sand the ends and backs of the mouldings. My wooden sticks or mouldings in this case, at first were way too long for building a frame for my board. So, the first thing we will have to do is to measure the length or with of the board and mark an angular of 45° at each end of the moulding. Try to be acurate, so the angulars will fit perfectly. After our marks are done, we can saw the rest off. To prevent splinters and sharp edgeds, I usually sand the ends and backs of the mouldings. 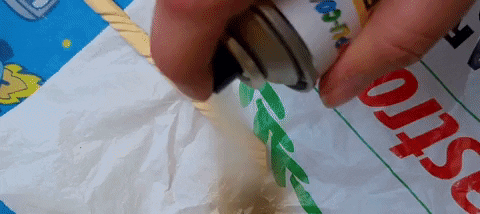 After that, you can also colour them outside just as you did with the wooden panel. In this case for a higher contrast and kinda sophisticated look, I chose golden spray colour which could be applied easily and looks awesome, honestly. When the mouldings have dried for about an hour, you can apply them to the wooden board with universal adhesive easily. After that, you can also colour them outside just as you did with the wooden panel. In this case for a higher contrast and kinda sophisticated look, I chose golden spray colour which could be applied easily and looks awesome, honestly. When the mouldings have dried for about an hour, you can apply them to the wooden board with universal adhesive easily.
Pro tip: For the board or the frame, you can also use painting or wood stain which you apply with a brush, classically. Wood stain makes it look more natural, while real painting makes it more smooth and even, depending on the paint, you can also do a high-gloss panel of course. I used spraying for much more of a vintage look. That just depends on your style and taste of course!
Step 4 – Decorations
The decorations, of course, are totally up to you, but you're warmly invited to take this as inspiration. I decided to do the memoboard in a celtic style with some LotR-motive as a silhouette. Of course, you can also add adornments, tendrils for some elvish vibes or do some writing on it.
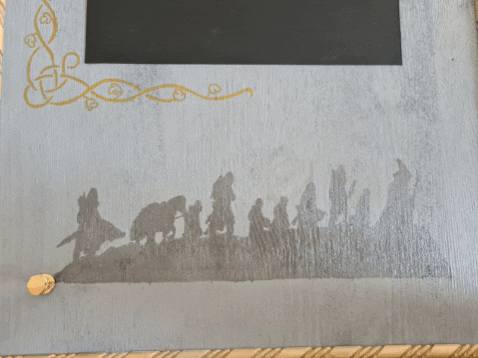
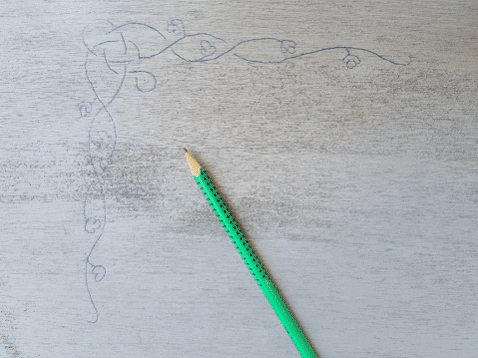 For my celtic elements I did some neverending tendrils in two edges, as a second frame for the memoboard. Before doing this, I marked where I will fix the memoboard, so I could position the design easier. The tendrils I just did with a golden pen. For my celtic elements I did some neverending tendrils in two edges, as a second frame for the memoboard. Before doing this, I marked where I will fix the memoboard, so I could position the design easier. The tendrils I just did with a golden pen.
My second decoration was the silhouette of the fellowship, which I had cut out on vinyl. I put the stencil in the middle of the lower part of the board. To place it right, I marked the middle of the stencil and the board, the borders to all sites are of the same size, in this case ca. 5 cm. After applying the stencil I used black metallic paint to colour it. Before attaching the memoboard and after glueing the frame onto the wooden panel, you should do a last spray paint session and use clear coating to protect the colours and the material. Let dry for some hours.
Step 5 – Bring it all together
Now we're ready to attach the memo board and the handles to create a key holder under the board as well. For the board you need a glue that's working for wood and metal of course, I again use my very strong and variable universal adhesive. Use enough glue to cover most of the back with a thin layer. You don't need the whole tube, it would be too much and just causing a gluey chaos.
 Finally, you can screw in the handles. Therefore, I marked five spots with the same distance inbetween each of it for my five handles. Also, I could use the lower border of my silhouette, which made it look even more awesome! Finally, you can screw in the handles. Therefore, I marked five spots with the same distance inbetween each of it for my five handles. Also, I could use the lower border of my silhouette, which made it look even more awesome!

As always, this is just a suggestion, but I totally love the outcome! And it is also magnetic! What do you think?
And here is also a last pro tip: Rather than real chalk, you can use chalk markers. Those have nice colours and last better. And the greatest advantage is that you don't have chalk anywhere!
|
 Easy
Easy 1 h + 24 h
 60 €
60 €